Create Navigation & Social Menus
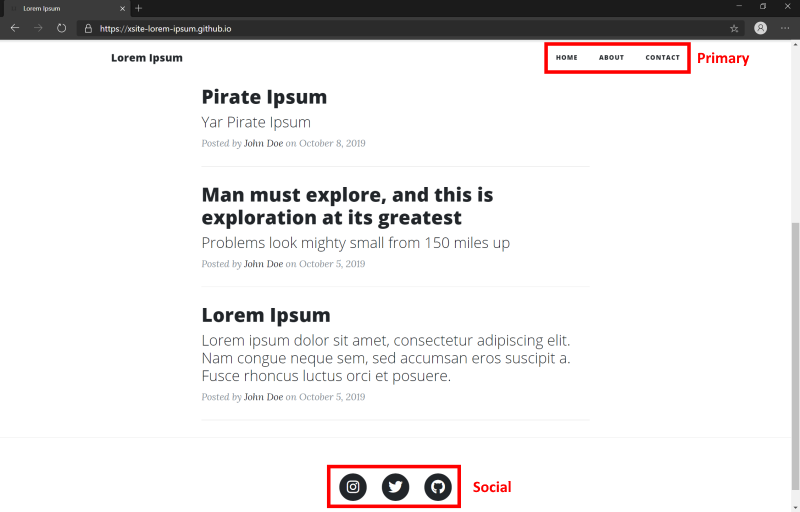
In this tutorial, we will be adding the main navigation (Primary) menu & the social (Social) menu to our blog.
The number of menus available is dependent on the selected theme. For the sample’s selected theme (Start Bootstrap Clean Blog), you will see 2 menu locations; Primary & Social.
Create the Primary menu
- Navigate to the Appearance screen & select Menus
- Click the +(plus) button to Add a new menu.
- In the New Menu dialog that appears, provide Primary in the Menu name field & click Create.

Add items to the Primary menu
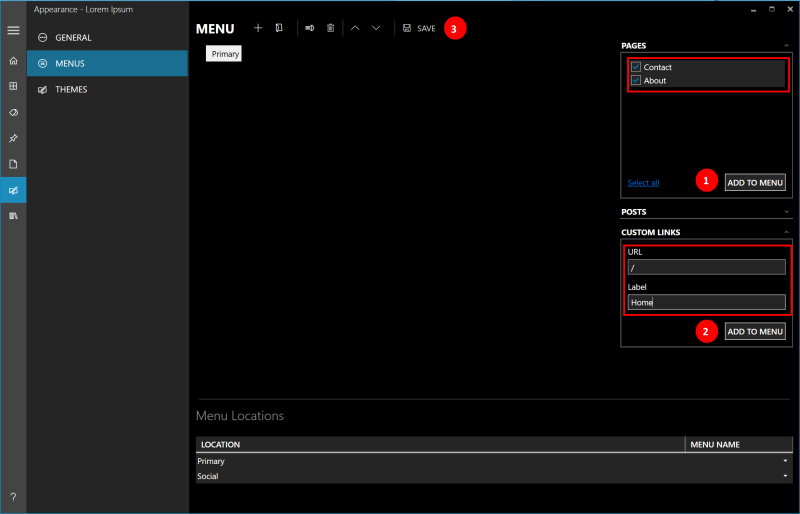
- Expand the Pages section, select Contact & About pages & click Add to Menu.
- In the Custom Links section,
- Provide / in the URL field.
- Provide Home in the Label field.
- Click Add to Menu.
Save the Primary menu
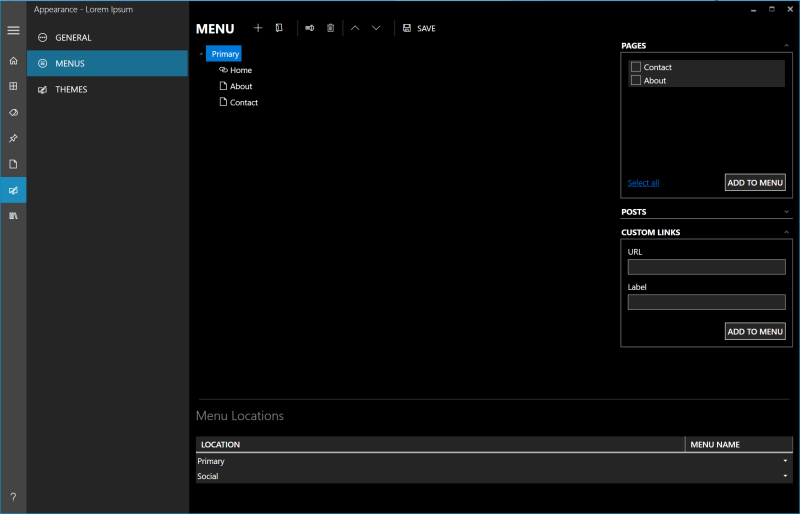
- Use the Toolbars Up & Down buttons to rearrange the menu items.
- Click Save.
Create the Social Menu
To create the Social menu, follow the same process as we did for the Primary menu earlier.
- Click the +(plus) button to Add a new menu.
- In the New Menu dialog that appears, provide Social in the Menu name field & click Create.
- Add links to Instagram, Twitter & GitHub. In the Custom Links section,
- Provide https://www.instagram.com/accountname in URL & Instagram in the Label field. Click Add to Menu.
- Provide https://www.twitter.com/accountname in URL & Twitter in the Label field. Click Add to Menu.
- Provide https://www.github.com/accountname in URL & GitHub in the Label field. Click Add to Menu.
- Click Save.
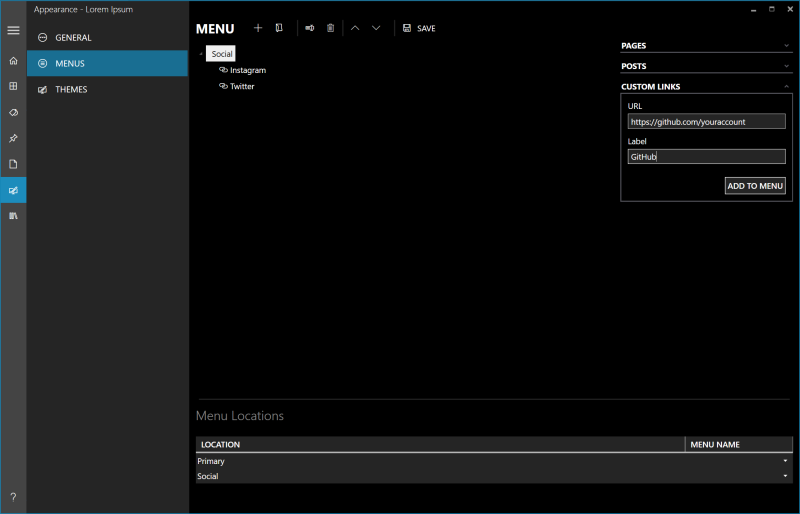
Adding the menus to the blog
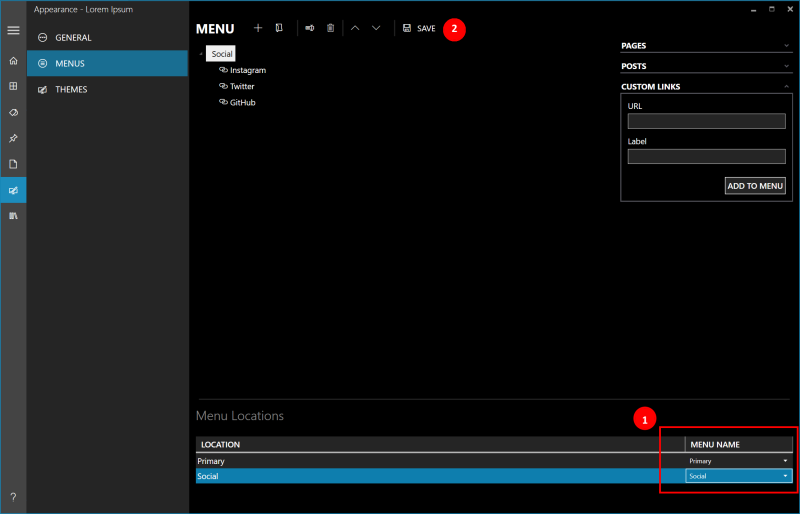
- In the Menu Locations section, associate Primary location to the Primary menu & Social location to the Social menu.
- Click Save.
